1MB Kickstart ROM for the A2000.
The A2000 was designed to accept a 512KB Kickstart ROM. This is now
inadequate for the new Kickstart modules in Amiga OS3.9 and for other
various modules created by third parties. Normally to circumvent this,
the new Kickstart ROM has to be cut down to accommodate these new larger
Kickstart modules. An example of this is the Kickstart as used in the
A4000T. In order to accommodate the additional scsi.device as used by
the onboard scsi controller, the workbench.library is deleted from the
ROM and has to be loaded from disk.
This simple modification allows the use of a 1MB Kickstart ROM in
the A2000. This will also work in the A500. Note that you will need a
rev 6 motherboard. Earlier versions may only be capable of supporting a
256KB Kickstart, and will need other alterations to accommodate this
modification. Its worth noting that Commodore got themselves in a bit
of a mess when drawing up the schematics of the A2000/A500. They had
the address lines on the 68000 start at A1, but on the Kickstart ROM,
they started at A0. So A1 on the 68000 is the same as A0 on the Kickstart.
A2 on the 68000 = A1 on the Kickstart and so on. Be aware of this to
avoid confusion. For the purpose of this document, I'll refer to addresses
from the point of view of the Kickstart ROM.
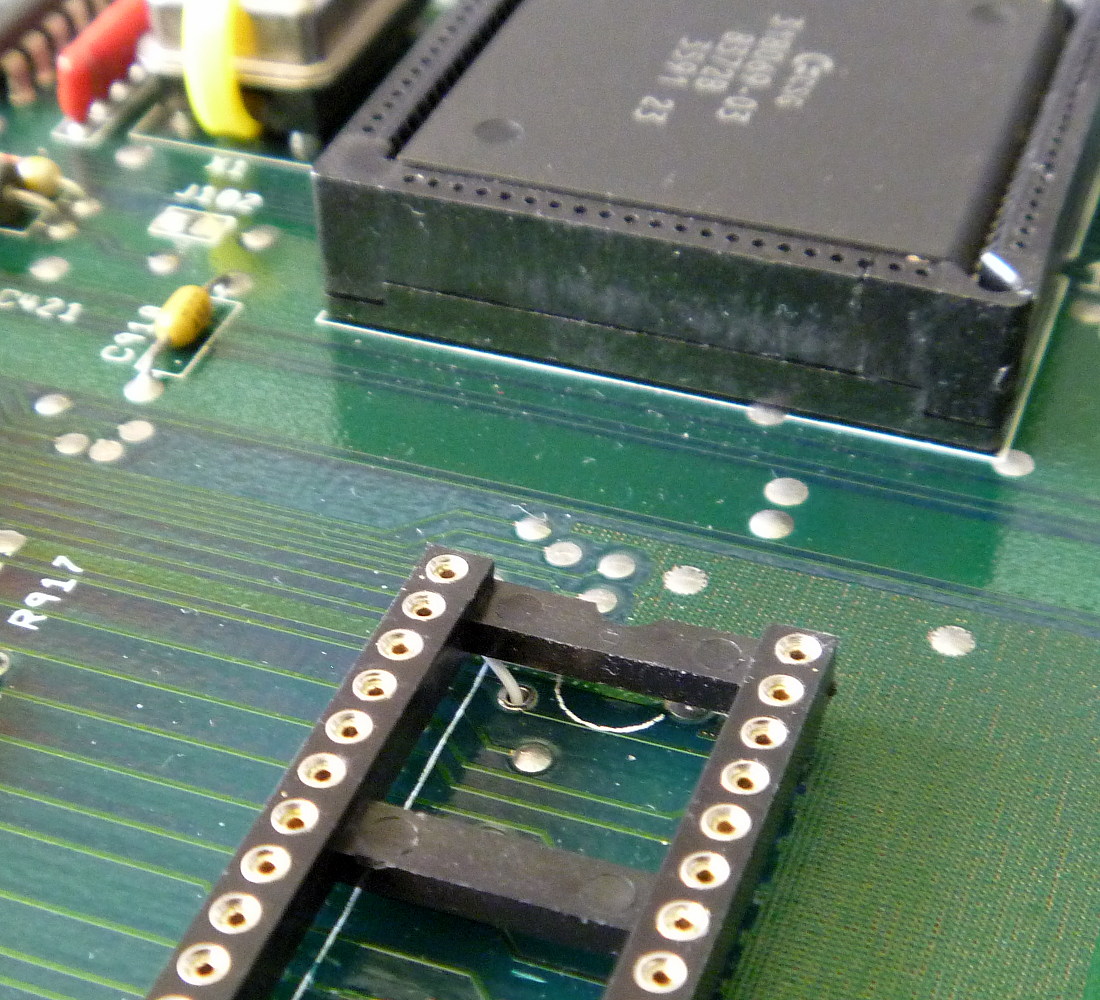
The upgrade can be achieved by replacing the original 40 pin Kickstart
socket with a 42 pin socket, and adding the extra address line. I used a
good quality 'machine pin' socket. The two new pins (pins 1 & 42)
are at the notched end of the socket. Because the motherboard only has
40 holes, these two pins are cut off short so that they do not touch the
PCB surface underneath when the socket is inserted into the
motherboard. Pin 42 is not connected. Pin 1 has a length of fine
insulated wirewrap wire soldered to the remaining stub. This forms the
new address line. Referring to the pic below, carefully remove the
solder from one of the plated through connections between the top and
bottom of the motherboard. Solder wick is ideal for this. Insert the new
socket, with pin 2 going into the hole for the former pin 1, pin 3 into
the hole for the former pin 2 and so on. Pass the fine wirewrap wire
through the new hole you created earlier as shown below. There must be
no electrical connection between this wire and the hole. Use insulated
wire. You should have pins 1 and 42 hanging over the end, and not
touching the motherboard. You may like to add some tape etc to provide
insulation if you have concerns.
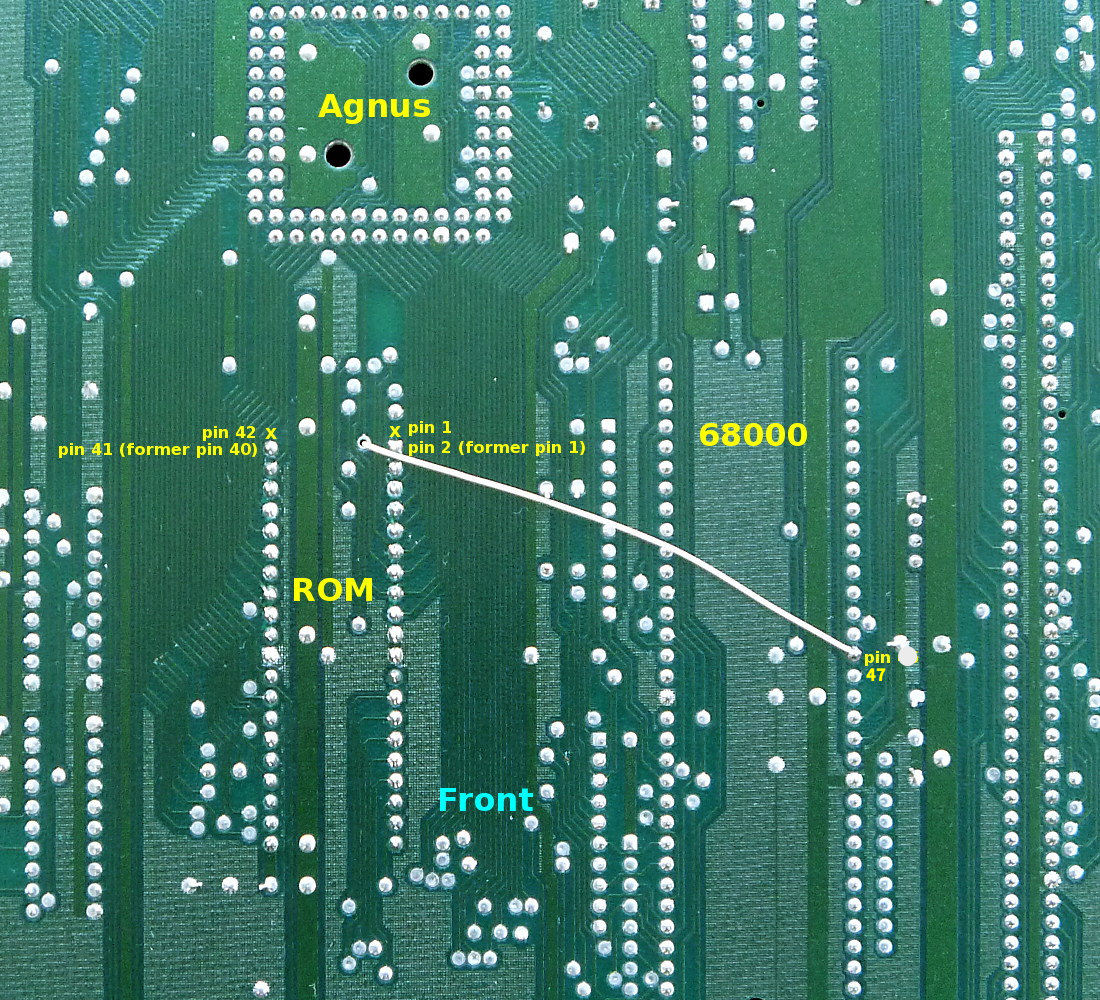
The other end of this wire is then soldered to pin 47 on the 68000
CPU socket. This provides the new address A18 signal to allow use of a
1MB Kickstart ROM. See below. The positions of Pins 1 & 42 are
marked by an 'x' showing where the pins would be if the motherboard had
holes for them.The former pin 1 is now pin 2 and the former pin 40 is
now pin 41.
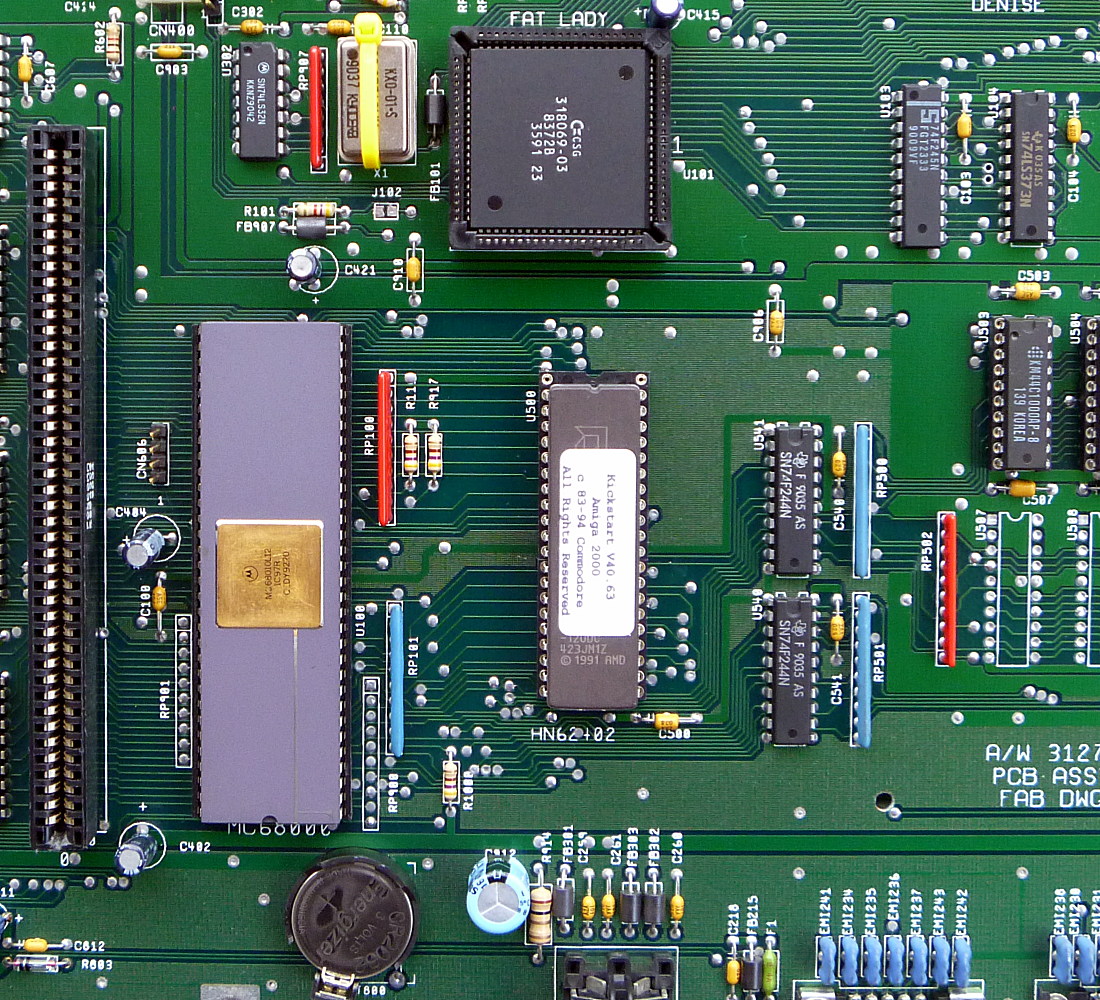
Your A2000 is now ready to use a 1MB Kickstart ROM. It
is still compatible with a standard 512K ROM. If you want to use one of
these, insert the ROM as shown below, with pins 1 & 42 vacant.
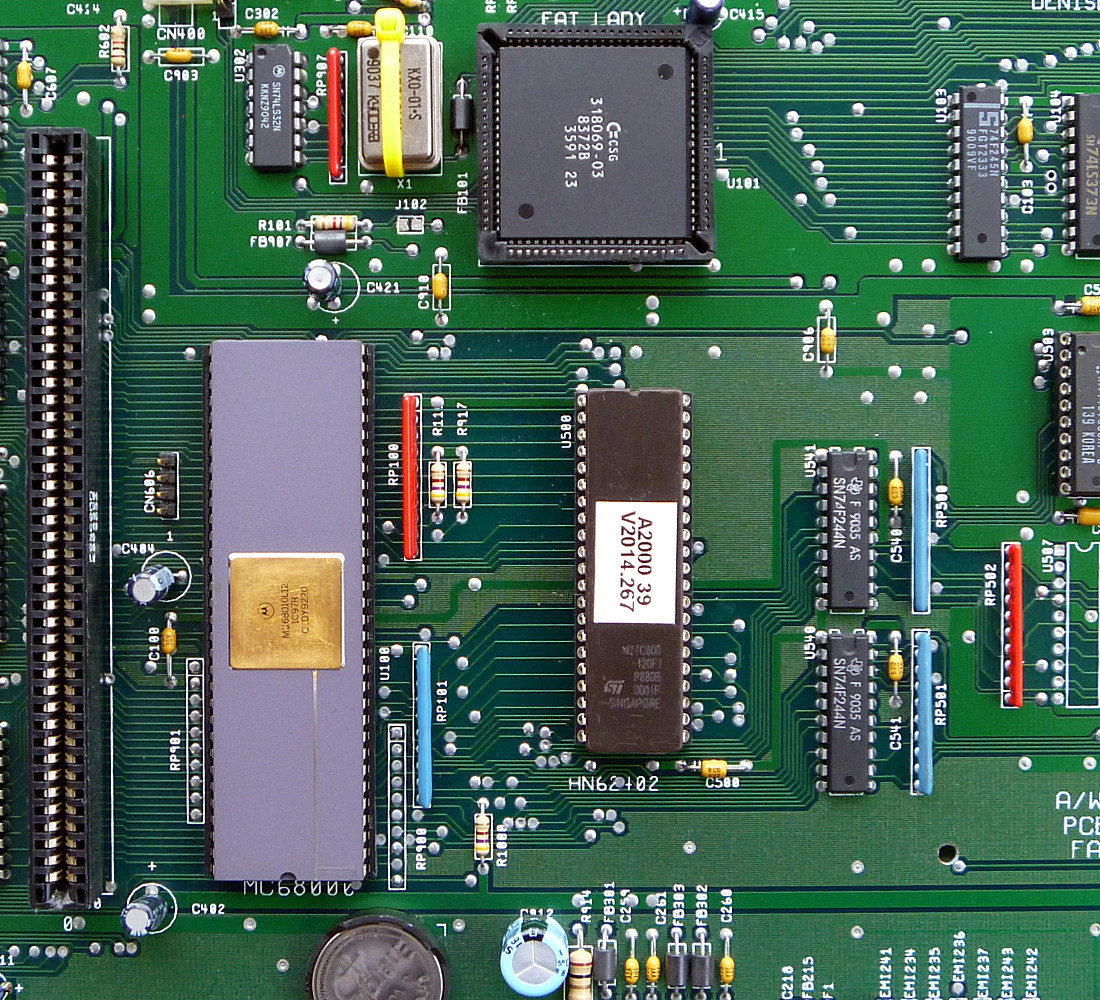
And below is an example of a 1MB custom Kickstart ROM
This modification can be further extended to allow support of 2MB Kickstarts.
To do this, you need to add a wire from pin 48 on the 68000 to the new pin 42
on the Kickstart socket. 512K and 1MB Kickstarts will still be compatible with
this addition.
Creating a 1MB Kickstart ROM.
Creating a working and functional custom Kickstart can be difficult
and complex. There are a number of tutorials out there. A good one is on
Mfilos' blog.
For those who are starting out, it might be a good idea to limit
yourself to creating a 'standard' OS 3.9 ROM. Once you have experience,
you can then try adding some of the many 3rd party ROM modules out
there. Many of them are still under development and may not work
properly on all systems. For example, I have so far been unable to get
any of the 3rd party versions of Exec to work in my A2000.